How to Use Black Eye Shadow Without Making Mistakes
Discover how to use black eye shadow without common mistakes! Learn expert tips for bold, flawless, and smudge-free eye makeup looks.
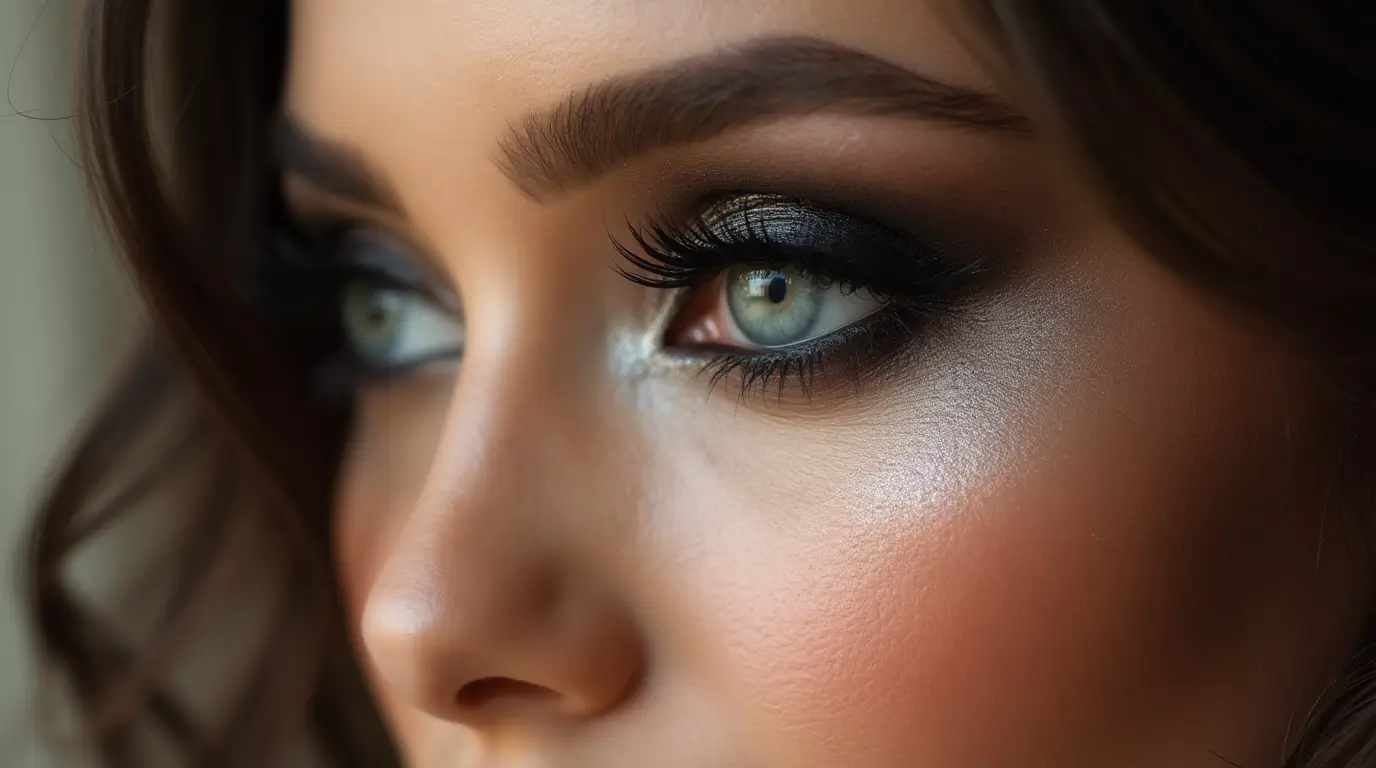
Table of Contents
Black eye shadow can transform your makeup look from everyday to extraordinary in an instant. This bold, dramatic shade creates depth, intensity, and sophisticated definition like no other color can. Yet so many makeup enthusiasts avoid it entirely, fearing raccoon eyes, harsh lines, or an overall messy appearance.
The truth is, black eye shadow isn’t nearly as intimidating as it seems—once you know the proper techniques. This guide will walk you through expert tips to avoid common mistakes and achieve flawless results that enhance rather than overwhelm your eyes.
Why Black Eye Shadow Can Be Tricky
Before diving into techniques, it’s helpful to understand what makes black eye shadow particularly challenging:
High Pigmentation: Black shadows are typically very pigmented, meaning a little product goes an extremely long way. One swipe delivers intense color that can be difficult to sheer out if you apply too much.
Visibility of Mistakes: Unlike softer browns or taupes, black shadow shows every uneven application or blending error. There’s little room for imprecision.
Difficulty Blending: The stark contrast between black shadow and skin makes seamless blending more challenging than with lighter shades.
Risk of Aging Effects: Applied incorrectly, black shadow can make eyes appear smaller or create a harsh effect that emphasizes fine lines.
Mistakes to Avoid With Black Eye Shadow
1. Skipping Eye Primer
One of the biggest mistakes is applying black shadow directly to bare lids. This leads to:
- Creasing within hours
- Shadow that fades unevenly
- Difficulty blending
- Product migration under the eyes
Fix: Always use an eye primer specifically designed to grip pigment. Allow it to set for 30 seconds before applying any shadow. For extremely oily lids, set your primer with a thin layer of translucent powder first.
2. Using the Wrong Brushes
The tools you use significantly impact your results with black shadow.
Common mistakes:
- Using only one brush for application and blending
- Brushes that are too large for precision work
- Brushes with bristles that are too stiff or too floppy
Fix: Invest in at least two quality brushes:
- A small, dense shader brush for precise application and packing on color
- A clean, fluffy blending brush with soft bristles for diffusing edges
3. Applying Too Much Product at Once
Loading your brush with too much black shadow immediately creates an intense, difficult-to-control application.
Fix: Tap excess product off your brush before applying to your lid. Start with a minimal amount and build up gradually in thin layers. This gives you much more control over the intensity and placement.
4. Not Blending Properly
Poor blending is instantly noticeable with black shadow, creating harsh, unnatural lines that look amateur.
Fix: Blend in small, circular motions along the edges of your shadow. Keep your blending brush clean—switch to a second clean brush for final blending to avoid adding more product. Remember: blend, don’t smear.
5. Skipping Transition Shades
Applying black shadow directly without transitional colors creates an abrupt, harsh effect that’s difficult to blend.
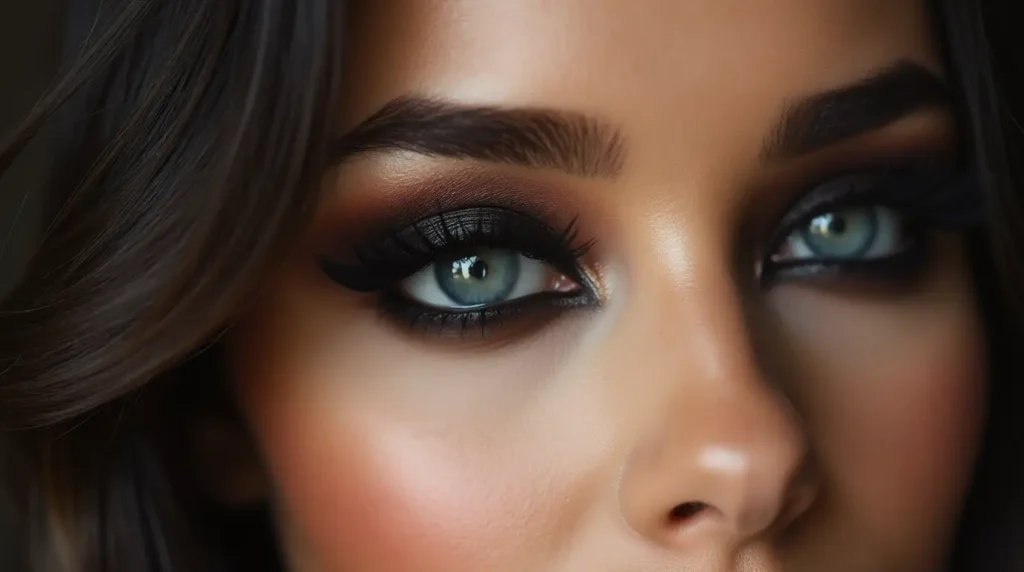
Fix: Always create a gradient by applying medium-toned transition shades (taupes, browns, or mauves) before introducing black. These intermediate colors create a bridge between your skin tone and the intense black, allowing for seamless blending.
6. Ignoring Eye Shape
A one-size-fits-all approach to black shadow placement rarely works. Different eye shapes require different application techniques.
Common mistakes by eye shape:
- Hooded eyes: Placing black shadow too high makes eyes appear even more hooded
- Deep-set eyes: All-over black shadow can make eyes look sunken
- Round eyes: Black shadow all around the eye can create an overly circular look
- Downturned eyes: Extending black shadow too far down at the outer corner can emphasize droopiness
Fix: Learn your specific eye shape and adapt techniques accordingly. For example:
- Hooded eyes: Focus black shadow on the outer V and keep it below the crease
- Deep-set eyes: Use black primarily as a liner and keep the lid lighter
- Round eyes: Extend black shadow outward at the corners to elongate
- Downturned eyes: Focus black shadow slightly upward at the outer corner
7. Not Cleaning Fallout
Black shadow fallout is particularly noticeable against your skin and foundation, creating what looks like dark under-eye circles or smudges.
Fix: Either:
- Do your eye makeup first, before foundation, so you can clean fallout without ruining your base
- Place loose translucent powder heavily under your eyes to catch fallout, then brush away when finished
- Keep cotton swabs and micellar water nearby for precise cleanup
Step-by-Step Guide to Flawless Black Eye Shadow
1. Prep Your Lids
Proper preparation is crucial for black shadow success:
- Clean your lids of any oils or residue
- Apply eye primer from lash line to brow bone
- Let the primer set for 30 seconds
- For oily lids, set with a thin layer of translucent or skin-tone powder
2. Choose the Right Black Shadow Texture
Different finishes create different effects:
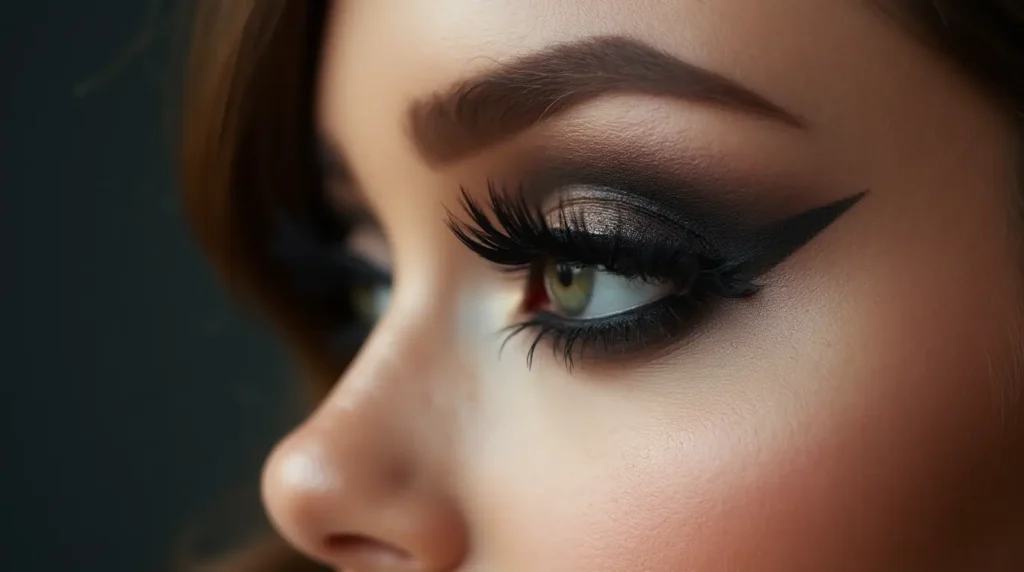
Matte black: Most dramatic and intense; perfect for creating depth and definition Satin black: Slightly more forgiving than matte; adds subtle dimension Shimmer or metallic black: More festive; reflects light and can be more wearable for special occasions
Choose based on your comfort level and the occasion. Beginners might find satin or shimmer blacks slightly more forgiving.
3. Start With a Transition Shade
Before reaching for black shadow:
- Apply a medium-toned neutral shade (taupe, brown, or mauve) to your crease
- Blend thoroughly to create a soft transition
- Add a slightly deeper shade to the outer portion of the crease
- Blend again until there are no harsh lines
This creates a gradient that will help your black shadow blend seamlessly.
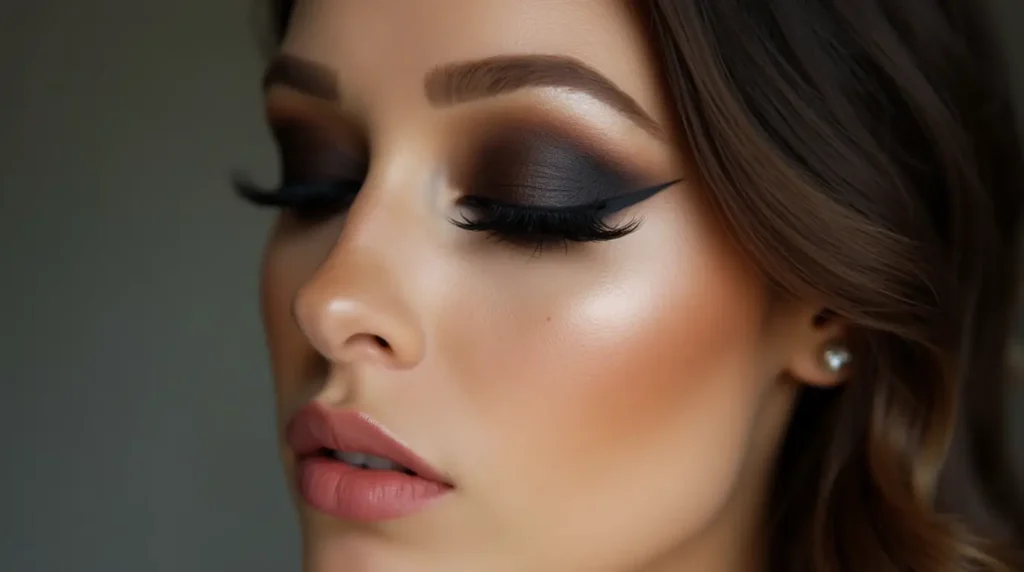
4. Apply Black Shadow Strategically
Now for the black shadow:
- Using your small, dense shader brush, pat (don’t swipe) a small amount of black shadow exactly where you want the most intensity—typically the outer corner or outer third of the lid
- Start with a small amount and build slowly
- Keep the application precise and controlled
- Avoid bringing too much black up into the crease initially
5. Add Dimension
Create depth and prevent a flat, one-dimensional look:
- Apply a lighter shade or shimmer to the inner corner to brighten
- Consider adding a mid-tone shade to the center of the lid for a multidimensional effect
- Make sure the darkest point is balanced by lighter elements elsewhere
6. Define with Liner & Mascara
Complete the look:
- Add black eyeliner to the upper lash line (and lower if desired) to define the eyes and conceal any gaps between shadow and lashes
- Curl your lashes and apply mascara generously
- Consider false lashes for special occasions—they balance the intensity of black shadow
7. Clean Up
Perfect the final look:
- Use a clean cotton swab dipped in micellar water to clean up any smudges
- Sharpen outer edges with concealer for a crisp cat-eye effect
- Check your work in different lighting to ensure even application
Pro Tips for Mastering the Look
Start Small: Try Black as a Liner
If you’re intimidated by black shadow, start by using it as an eyeliner:
- Dampen an angled brush
- Press it into your black shadow
- Apply along the lash line like you would a liner
- This technique gives you the impact of black without committing to a full smoky eye
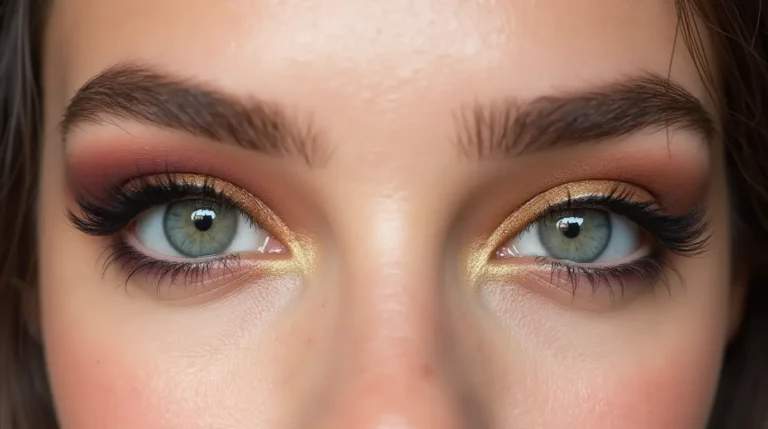
Mix With Metallics
Black shadow pairs beautifully with metallics:
- Layer gold, bronze, or silver over the center of the lid
- This creates dimension and breaks up the intensity of the black
- The contrast makes eyes appear brighter and more open
Use Setting Spray
For intense, long-lasting wear:
- Spritz your shadow brush lightly with setting spray before picking up black shadow
- This intensifies the pigment and helps prevent fallout and fading
- Apply as usual, but be aware the color will be even more intense
Practice With Charcoal or Gray First
If black feels too intimidating:
- Start with charcoal gray or deep brown
- These shades are more forgiving while you perfect your technique
- Once comfortable, transition to true black
Balance With Minimal Face Makeup
When wearing dramatic black eye shadow:
- Keep the rest of your makeup relatively subtle
- A natural-looking base and neutral blush balance intense eyes
- Consider lip color carefully—nude or subtle pink often works best, though a classic red can create a stunning high-contrast look
Final Thoughts
Black eye shadow doesn’t have to be intimidating or reserved only for special occasions. With proper technique, quality tools, and a bit of practice, it can become a versatile addition to your makeup repertoire.
Remember that practice makes perfect—don’t expect flawless results on your first try. Start with simpler looks and gradually build your confidence and skills with this powerful shade.
Whether you’re creating a subtle smoky effect or a bold, dramatic statement, black eye shadow can enhance your natural features and add sophistication to any makeup look. The key is approaching it with respect for its intensity and taking the time to apply it with care.
What black eye shadow look will you try first? The classic smoky eye, a sharp cat eye with winged shadow, or perhaps a subtle definition along your lash line? Whatever you choose, these techniques will help you avoid common mistakes and achieve the stunning results black eye shadow is known for.