
Skeleton Face Makeup: How to Nail the Ultimate Spooky Look
Learn how to create a flawless skeleton face makeup look with this step-by-step guide. Perfect for Halloween or any spooky event—easy, dramatic.
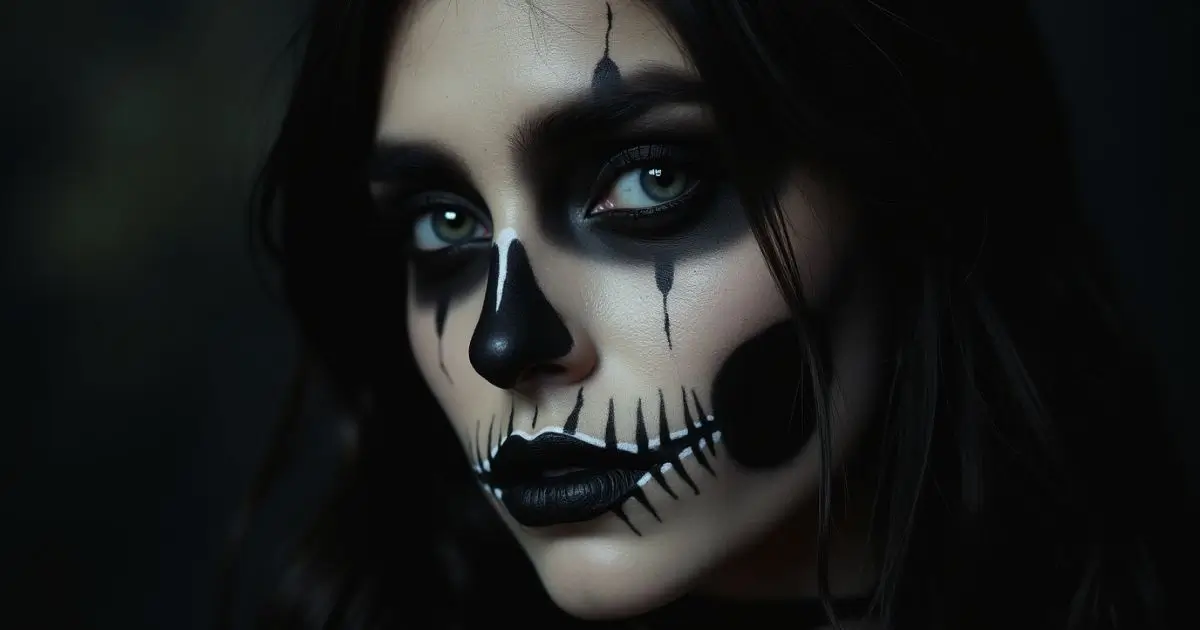
Are you ready to transform into a spooky character this Halloween? Skeleton face makeup is a classic choice for those looking to create a hauntingly beautiful look. With the right techniques and products, you can achieve a bone-chilling appearance that will leave everyone impressed.
skeleton face makeup
This article will guide you through the steps to master the art of skeleton face makeup, from preparation to the final touches. You’ll learn about the essential products needed, how to contour your face for a skeletal appearance, and tips for a long-lasting finish.
Key Takeaways
- Essential products for creating a skeleton look
- Step-by-step guide to applying skeleton face makeup
- Tips for achieving a long-lasting, spooky appearance
- Common mistakes to avoid when doing skeleton makeup
- Creative variations of the skeleton look
The Allure of Skeleton Face Makeup
Skeleton makeup is more than just a Halloween trend; it’s a form of artistic expression with deep cultural roots. The fascination with transforming into a skeleton for a night is rooted in history, symbolism, and the thrill of embracing the spooky spirit of Halloween.
The Cultural Significance of Skull Imagery
Skull imagery has been a part of various cultures for centuries, often symbolizing mortality, rebellion, and mysticism. In the context of Halloween skeleton makeup, this imagery is used to pay homage to these cultural narratives while celebrating the spooky season. The use of skull face paint allows individuals to connect with these deeper meanings on a superficial level, adding a layer of depth to their Halloween celebrations.
| Culture | Significance of Skull Imagery |
| Mexican | Honoring the dead during Dia de los Muertos |
| Western | Symbolizing mortality and rebellion |
| Asian | Representing spiritual growth and renewal |
Why Skeleton Looks Remain a Halloween Favorite
The enduring popularity of skeleton face makeup can be attributed to its versatility and the creativity it allows. Whether you’re aiming for a classic skeleton look or a more elaborate design, the options are endless. This flexibility, combined with the cultural significance of skull imagery, makes skeleton makeup a staple of Halloween celebrations.
Furthermore, the rise of social media has made it easier for individuals to share their Halloween skeleton makeup creations, inspiring others and fueling the trend.
Essential Supplies for Skeleton Face Makeup
Achieving a spooky skeleton look involves gathering essential makeup supplies. To create a convincing skeleton face makeup, you’ll need to invest in some key products and tools that will help you achieve a professional-looking finish.
Must-Have Makeup Products
To start, you’ll need some fundamental makeup products. These include:
Face Paints and Foundations
A good quality white face paint or foundation is crucial for creating the base of your skeleton look. Look for products that are specifically designed for face painting or special effects makeup. Brands like Kryolan and Snazaroo offer a range of colors and finishes that can help you achieve a realistic skeleton appearance.
Brushes and Applicators
Having the right brushes and applicators is vital for applying your makeup smoothly and accurately. Invest in a variety of brushes in different sizes to help you get into the nooks and crannies of your face. You can also use sponges and cotton swabs for certain details.
Setting Products
To ensure your skeleton makeup lasts all night, you’ll need some setting products. A good setting spray can help keep your makeup in place, even through sweat and tears. Consider using a translucent powder to set your face paint or foundation.
Budget vs. Professional Options
When it comes to choosing your makeup products, you have a range of options at different price points. While professional products like those from Kryolan offer high-quality finishes, they can be more expensive. On a budget? Consider looking for more affordable alternatives that still offer good quality, such as products from SnowCon or Wolfe FX. The table below compares some popular budget and professional options:
| Product | Budget Option | Professional Option |
| White Face Paint | SnowCon ($10) | Kryolan ($20) |
| Black Eyeliner | Wolfe FX ($8) | Mehron ($15) |
| Setting Spray | NYX ($10) | Kryolan ($25) |
Additional Tools for Special Effects
For a more realistic skeleton look, you might want to consider additional tools for special effects. These can include liquid latex, gelatin, or prosthetic pieces to create more detailed and textured effects. You can also use fake blood and wounds to add an extra layer of realism to your look.
Preparing Your Canvas
Before you start transforming into a skeleton, it’s crucial to prep your canvas. A well-prepared skin surface is essential for a smooth and long-lasting easy skeleton makeup application.
Pre-Makeup Skincare Routine
A good skincare routine is the foundation of any successful makeup look, including skeleton makeup. Start by cleansing your face to remove dirt and impurities. Follow up with a toner to balance your skin’s pH and tighten pores.
Next, apply a moisturizer suitable for your skin type. Even if you’re going for a dry, cracked skeleton look, moisturizing helps prevent irritation and ensures a more even makeup application. Finally, allow your skin to absorb the products before moving on to makeup.
Creating the Perfect Base
With your skin prepped, it’s time to create a flawless base for your easy skeleton makeup. This involves several key steps:
Primer Application
Apply a primer to create an even surface for your makeup. This helps your skeleton makeup last longer and look smoother.
Color Correction Tips
If you have any skin tone issues like redness or sallowness, use a color corrector to neutralize them. This ensures your skeleton look appears more even and realistic.
Base Setting Techniques
Once your base is applied, set it with a light dusting of powder. This step is crucial for making your easy skeleton makeup last throughout the night.
By following these steps, you’ll be able to achieve a professional-looking skeleton makeup that’s both durable and visually striking.
Step-by-Step Skeleton Face Makeup Tutorial
Achieving a professional-looking skeleton makeup look at home is simpler than you think, and we’re here to walk you through it. With this comprehensive guide, you’ll learn how to transform your face into a spooky skeleton with ease.
Step 1: Applying the White Foundation
The first step in creating a skeleton face makeup look is applying a white foundation. This serves as the base for your entire design.
Coverage Techniques
To achieve an even base, use a foundation that’s one to two shades lighter than your natural skin tone. Apply it using a beauty blender or a foundation brush for optimal coverage.
Blending Methods
Make sure to blend the foundation well around the hairline, jawline, and edges of the face to prevent any harsh lines. You can use a sponge or a brush for this purpose.
Step 2: Mapping Your Skull Structure
After applying the white foundation, the next step is to map out the skull structure on your face.
Facial Anatomy Basics
Understanding the basic anatomy of the face is crucial. The skull has several key features, including the eye sockets, nasal cavity, and jawline.
Placement Guidelines
Use a pencil or a thin brush to lightly draw the outline of the skull structure on your face. This will serve as a guide for the rest of your makeup.
Step 3: Creating Hollow Eye Sockets
One of the most distinctive features of a skeleton is the hollow eye sockets.
Shading Techniques
To create the illusion of depth, use a dark eyeshadow or black eyeliner to shade the area around the eyes. Start from the inner corner and work your way outward.
Blending Tips
Blend the shading well to avoid harsh lines. You can use a cotton swab or a small brush for this.
Step 4: Defining the Nose Cavity
The nose cavity is another key feature that needs to be defined for a realistic skeleton look.
Use a black eyeliner or a dark shade of eyeshadow to create the nasal cavity. Start from the tip of the nose and work your way up to the bridge.
Step 5: Drawing the Jaw and Teeth
The final steps involve drawing the jawline and creating the teeth.
Teeth Detailing
For the teeth, you can use white glue or liquid latex to create a more realistic effect. Paint the teeth using a small brush and white paint or makeup.
Creating Realistic Bone Structure
To enhance the bone structure, use a gray or black shade to shade the areas around the jaw and cheekbones, giving it a more skeletal appearance.
“The art of makeup is not just about enhancing one’s features, but also about transforming into a completely different character.”
With these steps, you’ll be able to achieve a spooky skeleton look that’s sure to impress.
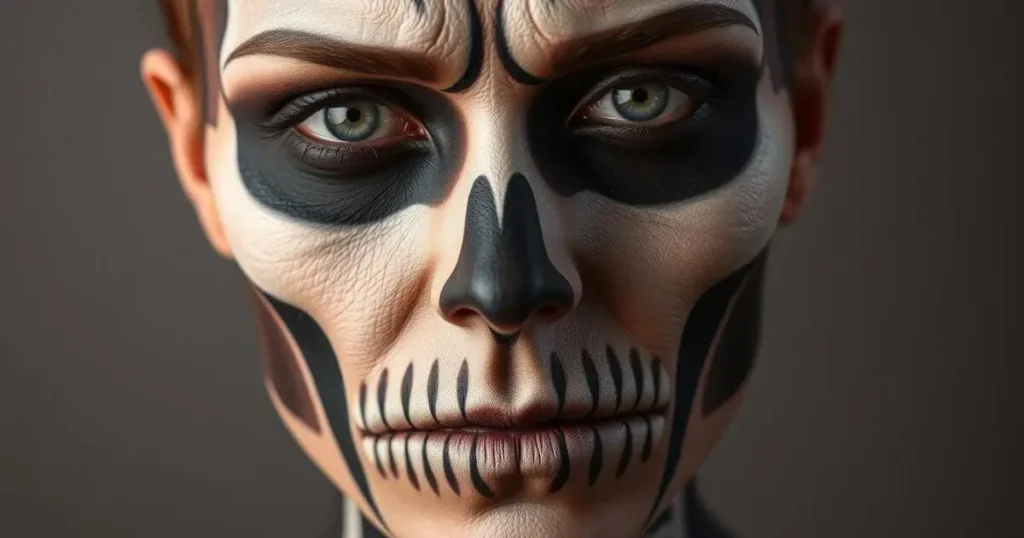
Advanced Techniques for Realistic Skeleton Makeup
Achieving a realistic skeleton makeup look requires more than just the basics; it’s about mastering advanced techniques that bring your spooky skeleton makeup to life. To create a truly convincing skeleton, you need to focus on the details that make a significant difference.
Creating Bone Texture and Dimension
To give your skeleton makeup a more authentic look, you need to create bone texture and dimension. This can be achieved by using various makeup techniques and products. For instance, you can use a texture paste or a cream-based product to create a raised, bone-like effect on the surface of your skin.
Techniques for Bone Texture:
- Using a stippling technique with a darker shade to create depth
- Applying a texture paste to mimic the appearance of bone
- Blending edges to create a seamless transition
Mastering Highlights and Shadows
Highlights and shadows play a crucial role in creating a realistic skeleton makeup look. By mastering the use of light and dark shades, you can create the illusion of depth and dimension on your face. Use a lighter shade to highlight areas that would naturally protrude, such as the cheekbones and brow ridge.
| Area | Highlight/Shadow | Effect |
| Cheekbones | Highlight | Creates a more defined bone structure |
| Eye Sockets | Shadow | Adds depth to the eye sockets |
| Nose Cavity | Shadow | Enhances the illusion of a hollow nose |
Incorporating Cracking and Aging Effects
To add an extra layer of realism to your skeleton makeup, consider incorporating cracking and aging effects. This can be achieved using makeup products that dry out to create a cracked appearance or by using pre-made designs that mimic aged bone.
Tips for Aging Effects:
- Using a mixture of makeup and texture paste to create cracked areas
- Applying subtle shading to enhance the appearance of aged bone
- Blending the edges of cracked areas to create a natural transition
Popular Skeleton Makeup Styles
The versatility of skeleton makeup allows you to experiment with different looks, from spooky to sophisticated. Whether you’re attending a Halloween party or just want to stand out, there are numerous skeleton makeup ideas to inspire your creativity.
Let’s explore some of the most popular skeleton makeup styles that you can try this Halloween season.
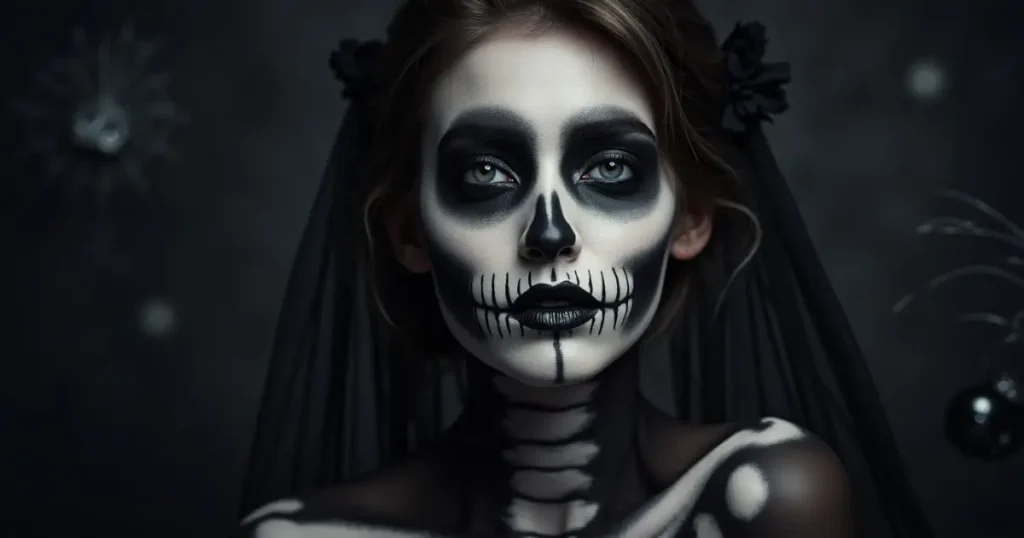
Classic Skeleton Look
The classic skeleton look is a timeless choice for Halloween. It involves creating a white skull face with black eye sockets and a jawline. To achieve this look, start with a white foundation covering your entire face. Use black eyeliner or face paint to draw the eye sockets, nose cavity, and jawline. You can add some shading to give your skeleton a more realistic appearance.
- Apply white foundation all over your face.
- Use black eyeliner to create eye sockets and a jawline.
- Add shading for a more realistic look.
Day of the Dead Inspired Designs
Day of the Dead (Día de los Muertos) inspired skeleton makeup is a vibrant and colorful alternative to the traditional spooky look. This style often features intricate designs, flowers, and bright colors. You can incorporate sugar skull makeup elements, such as colorful stripes and patterns, to create a festive and celebratory look.
Glamorous Skeleton Variations
For a more glamorous take on skeleton makeup, consider adding some sparkle and shine to your design. You can use glitter eyeshadows, rhinestones, or metallic paints to give your skeleton a luxurious feel. This style is perfect for those who want to stand out at a Halloween party or event.
- Add glitter eyeshadows for a sparkly effect.
- Use rhinestones or metallic paints for extra glamour.
Half-Face Skeleton Techniques
Half-face skeleton makeup is a creative twist on the traditional full-face skeleton look. This style involves applying skeleton makeup to only one half of your face, often contrasting it with a more glamorous or natural look on the other half. It’s a great way to create a unique and eye-catching design.
To achieve a half-face skeleton look, carefully divide your face in half and apply the skeleton makeup to one side. You can use a liquid latex or face paint to create a seamless transition between the two halves.
Quick and Easy Skeleton Face Paint Options
Creating a skeleton face paint look can be both quick and easy, perfect for last-minute Halloween preparations. Whether you’re short on time or new to face makeup, there are several methods to achieve a convincing skeleton appearance without spending hours in front of the mirror.
For a speedy transformation, consider using face paint or makeup products specifically designed for quick application. These products are usually available in Halloween stores or online and can significantly cut down your preparation time.
15-Minute Express Skeleton Makeup
To achieve a skeleton look in just 15 minutes, focus on the essentials: a white base, dark eye sockets, and a defined jawline. Start with a quick application of white face paint or foundation across your entire face. Use a dark eyeshadow or eyeliner to create the eye sockets and a black lip liner to outline your jaw and teeth. This simplified approach still captures the essence of the skeleton aesthetic.
For an even quicker method, consider using pre-made stencils or stickers designed for skeleton face makeup. These tools can help you achieve a more precise look without the need for extensive makeup experience.
Using Stencils and Pre-Made Designs
Stencils and pre-made designs are excellent for those who are new to makeup or pressed for time. These tools provide a guide, ensuring that your skeleton face paint looks symmetrical and well-defined. To use a stencil, simply place it on your face and apply paint or makeup over it. For more detailed designs, you can layer different stencils or add additional details with makeup brushes.
| Product | Description | Application Time |
| White Face Paint | Covers the entire face | 2-3 minutes |
| Dark Eyeshadow | Creates eye sockets | 1-2 minutes |
| Black Lip Liner | Defines jawline and teeth | 1-2 minutes |
As makeup artist Sarah Jones notes, “Using stencils can be a game-changer for those new to skeleton makeup. It simplifies the process and ensures a professional-looking finish.”
By incorporating these quick and easy methods into your Halloween preparations, you can achieve a compelling skeleton look without the need for extensive time or makeup expertise.
Adapting Skeleton Makeup for Different Face Shapes
The key to a great skeleton makeup look lies in understanding how to adapt it to your unique face shape. Whether you’re sporting a round, oval, or square face, customizing your halloween skeleton makeup can make all the difference in achieving a spooky yet flattering look.
Customizing for Round, Oval, and Square Faces
For round faces, creating the illusion of length is crucial. You can achieve this by elongating the skull structure and emphasizing the eye sockets. Oval faces are versatile and can pull off most skeleton designs, but accentuating the cheekbones can add depth. Square faces benefit from softer, more curved lines to contrast with the angular jawline.
“The art of makeup is not just about painting on a design; it’s about enhancing your features.” This is particularly true for skeleton makeup, where understanding your face shape can help you create a more convincing and aesthetically pleasing look.
Adjusting for Different Features
Different facial features also require adjustments in your skeleton makeup. For instance, if you have prominent eyes, you might want to balance them out with a more subtle nose cavity. Conversely, if your eyes are smaller, darker eye sockets can create a more dramatic effect. Experimenting with different techniques can help you find the perfect balance for your features.
Troubleshooting Common Skeleton Makeup Mistakes
Achieving a flawless skeleton makeup look can be challenging, but with the right techniques, you can overcome common mistakes. Even with a great skeleton makeup tutorial, things can still go wrong, but don’t worry, we’ve got you covered with some troubleshooting tips.
When applying skeleton makeup, it’s easy to encounter issues such as smudges and smears. To fix these problems, follow these steps:
- Gently blot the smudged area with a cotton swab or a clean cloth.
- Use a small brush to reapply the makeup, feathering it out towards the edges.
- Set the corrected area with a light dusting of translucent powder.
Fixing Smudges and Smears
Smudges and smears can be frustrating, but they’re easy to fix. To avoid smudging, make sure to:
- Allow each layer of makeup to dry completely before moving on to the next step.
- Use a light touch when applying makeup, as heavy pressure can cause smudging.
- Set your makeup with a setting spray to prevent smudging and smearing.
Correcting Uneven Application
Uneven application can be a challenge, but there are ways to correct it. To achieve a more even look:
- Use a color corrector to neutralize any areas that are too dark or too light.
- Blend, blend, blend! Make sure to blend the edges of your makeup so that they merge seamlessly with your skin.
skeleton makeup tutorial
By following these tips, you’ll be able to troubleshoot common skeleton makeup mistakes and achieve a spooky, yet flawless look. With practice and patience, you’ll become a pro at creating a realistic skeleton face makeup look.
Making Your Skeleton Makeup Last All Night
You can keep your skeleton makeup looking fresh and intact all night by following a few simple steps. Ensuring durability and having a touch-up plan are crucial for a successful skeleton face painting tutorial.
Setting Techniques for Durability
To make your skeleton makeup last, it’s essential to set it properly. Start by applying a setting spray all over your face. This helps to lock in the makeup and prevent smudging. For areas that are prone to oiliness, such as the T-zone, consider using a setting powder to absorb excess oil and keep your makeup looking matte.
Key Setting Techniques:
- Apply setting spray after completing your makeup
- Use setting powder on oily areas
- Avoid touching your face to prevent smudging
| Product | Purpose | Application Tip |
| Setting Spray | Locks in makeup | Spray evenly across the face |
| Setting Powder | Controls oiliness | Dust lightly on oily areas |
Touch-Up Strategies for Long Events
For events that extend into the night, having a touch-up plan is vital. Carry a small bag with essentials like your setting spray, a mirror, and any necessary makeup for touch-ups. Blotting papers can also be useful for absorbing oil without smudging your makeup.
By combining proper setting techniques with a thoughtful touch-up strategy, you can enjoy a long-lasting skeleton makeup look that remains fresh and spooky throughout the night.
Completing Your Skeleton Costume
Completing your skeleton costume involves more than just face makeup; it’s about creating a cohesive, spooky appearance. To achieve a truly terrifying look, you’ll need to consider your overall style, including your hairstyle and clothing.
Complementary Hairstyling Ideas
When it comes to hairstyling for a skeleton costume, you have several options. You can create a spider web effect by using black hair gel or spray to style your hair into web-like patterns. Alternatively, you can opt for a bone-chilling braided look by incorporating white or gray strands into your braids. For a more dramatic effect, consider using temporary hair color or chalk to achieve a bone-white or ash-gray hue.
- Use hair gel or spray to create web-like patterns
- Incorporate white or gray strands into braids for a bone-chilling effect
- Try temporary hair color or chalk for a bold, spooky color
Outfit Suggestions to Match Your Makeup
To complement your spooky skeleton makeup, choose an outfit that enhances your overall appearance. Consider wearing tattered and worn clothing to give your skeleton a more authentic, aged look. You can also add some artificial bones or ragged edges to your clothing to create a more dramatic effect. For a more glamorous take on the skeleton look, try pairing your makeup with a black evening gown or a tattered suit.
Safe Removal and Aftercare
Once the Halloween party is over, gently removing your skeleton makeup is essential to maintain healthy, irritation-free skin. The process involves more than just washing your face; it requires a gentle and thorough approach to remove all the makeup, including the skull face paint, without causing damage.
Removing Makeup Gently
To remove your easy skeleton makeup, start by using a gentle makeup remover. Apply it to a cotton pad and gently wipe away the makeup, avoiding rubbing or tugging on your skin. For stubborn areas, repeat the process until all makeup is removed.
skeleton face makeup removal
Post-Halloween Skincare
After removing your makeup, restore your skin’s health with a post-Halloween skincare routine. Cleanse your face with a mild cleanser, followed by a toner to balance your skin’s pH. Apply a nourishing moisturizer to hydrate your skin.
| Skincare Step | Purpose |
| Cleansing | Remove remaining makeup and impurities |
| Toning | Balance skin pH |
| Moisturizing | Hydrate and nourish the skin |
Conclusion
Now that you’ve learned the ins and outs of skeleton face makeup, it’s time to put your new skills to the test. From preparing your canvas to advanced techniques, you’ve got the tools to create a spooky or glamorous look that’s sure to turn heads.
With your newfound expertise, you can experiment with different styles, from classic skeleton to Day of the Dead-inspired designs. Don’t be afraid to get creative and make the look your own. Whether you’re heading to a Halloween party or just want to add some edge to your everyday look, skeleton face makeup is a versatile and exciting option.
To take your skeleton face makeup to the next level, practice makes perfect. Try out different products and techniques to find what works best for you. With a little patience and practice, you’ll be a skeleton face makeup pro in no time, ready to spookify your look and impress friends and family.
FAQ
What is the best way to remove skeleton face makeup?
To remove skeleton face makeup, use a gentle makeup remover, such as micellar water or a makeup remover wipe, and gently wipe away the makeup. Follow up with a thorough skincare routine to clean and moisturize your skin.
How do I make my skeleton makeup last longer?
To make your skeleton makeup last longer, use a setting spray to set the makeup, and avoid touching or rubbing your face. You can also use a translucent powder to absorb excess oil and prevent smudging.
What kind of paint is best for skeleton face makeup?
For skeleton face makeup, it’s best to use face paint or makeup specifically designed for the face, such as Kryolan or Mehron. These products are usually hypoallergenic and designed for use on skin.
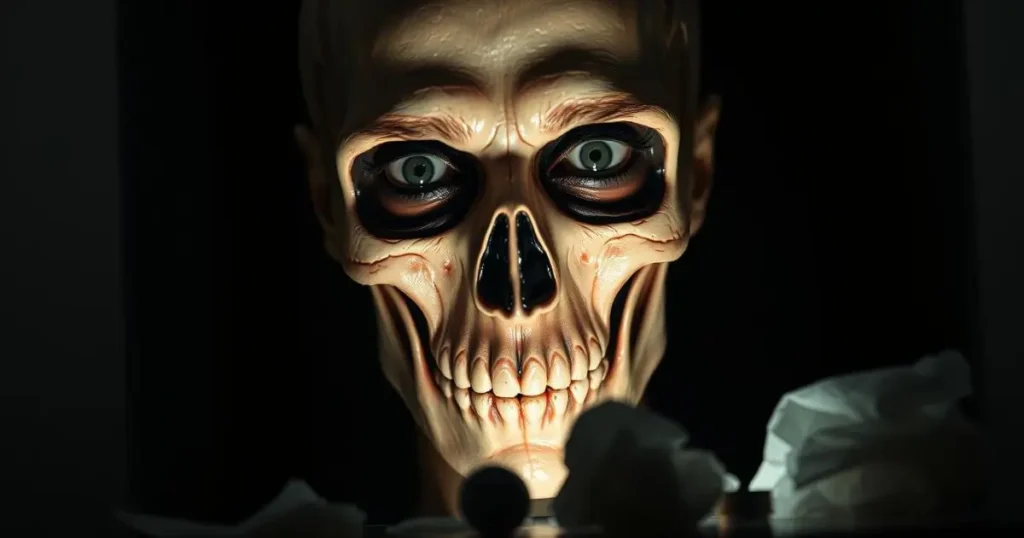
How do I create a realistic skeleton look?
To create a realistic skeleton look, pay attention to the details, such as shading and highlighting the skull structure, creating a hollow eye socket effect, and defining the nose cavity and jawline. Use reference images to get an idea of the skeletal structure.
Can I use regular makeup for skeleton face paint?
While you can use regular makeup for skeleton face paint, it’s not recommended as it may not be as durable or provide the desired level of coverage. Specialized face paint or makeup is usually a better option.
How do I adapt skeleton makeup for different face shapes?
To adapt skeleton makeup for different face shapes, consider the natural contours of your face and adjust the makeup accordingly. For example, on a round face, you can create the illusion of longer, more angular features.
What are some common mistakes to avoid when doing skeleton makeup?
Common mistakes to avoid when doing skeleton makeup include uneven application, smudging, and not setting the makeup properly. To avoid these mistakes, use reference images, take your time, and practice beforehand.
How can I achieve a spooky skeleton look?
To achieve a spooky skeleton look, focus on creating a realistic skull structure, and add shading and highlighting to create depth and dimension. You can also add special effects, such as cracking or aging, to enhance the look.
